
Delivering Your Solution
Step One: Getting Started (Again)
Part Two: And Moving Forward
So we got connected to our farm, loaded Visual Studio, and build our first custom SharePoint 2013 visual web part.
From here there’s two ways we can go. First, obviously we could make the web part more complicated. Sure. We’ve done some of that before. But, second, we need to be able to build our web part into something that might be usable to an audience. Let’s look at this second issue first.
First of all. Let’s recall that my VS project was called VisualWebPartProject2 and notice that VS projects, by default, create things inside our \Documents\Visual Studio 2012\Projects\<Project Name> \<Project Name>\bin\Debug folder.
Inside that folder, there’s a VisualWebPartProject2.wsp. This is a genuine SharePoint 2013 solution. To prove it, we go to Site Settings | Solutions and click on the Upload Solution link on the ribbon. We navigate out to our \bin\ folder and select the .wsp and click Open
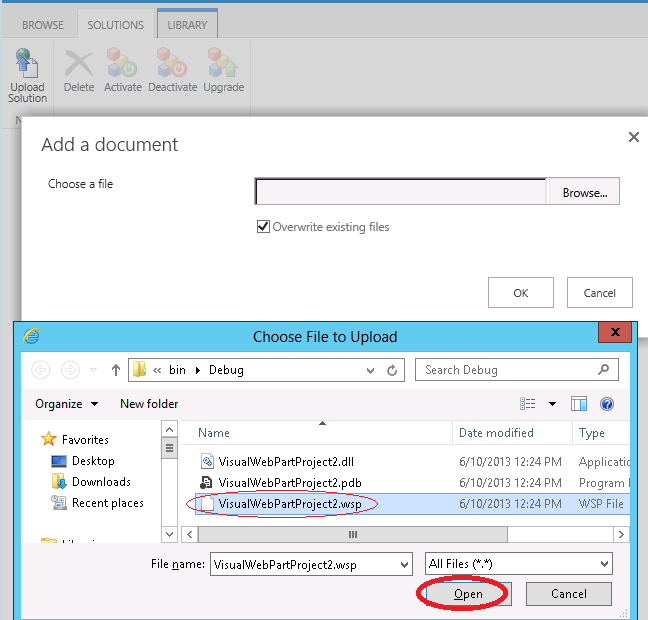
Adding the .wsp File
Then, we get a chance to activate our solution by clicking on the Activate link.
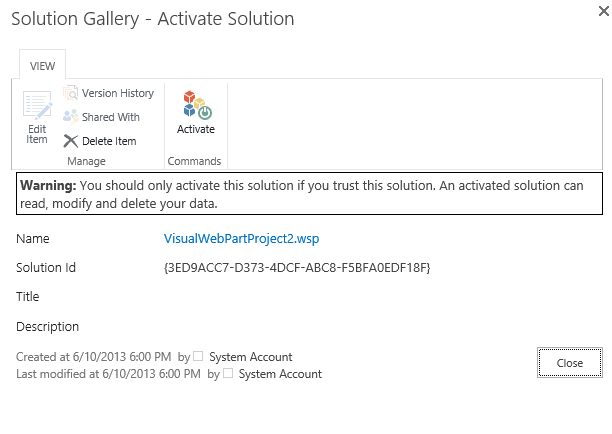
Activate the Solution
Now, we can navigate out to a typical team site, edit a page, click on Web Part on the Insert ribbon and select the VisualWebPartProject2 web part from the Custom web parts category and click on Add. And there it is, Hello World in all it’s glory.
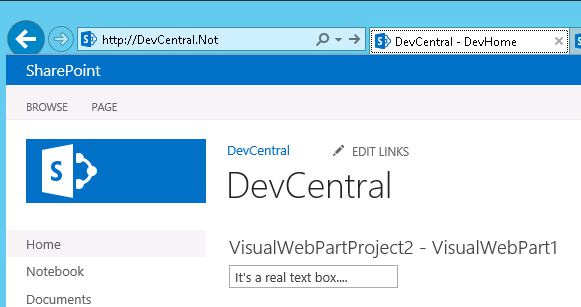
A Real Text Box in a Custom Web Part