Archive for the Category Uncategorized


Convenient Links in SharePoint

Some things I’ll just leave here…

It’s good to be back.

Here’s some URLs that might come in handy:

/_layouts/Authenticate.aspx – Opens the login dialog box.
/_layouts/settings.aspx – Opens site settings.
/_layoutscreate.aspx – Opens the create page.
/_layouts/15/viewlsts.aspx – Opens Site Contents.
/_layouts/15/listedit.aspx?List=<list guid> – Opens the list settings.
javascript:GoToModern(True) – Exit Classic Experience

These are cool:

javascript:(function(){document.cookie=”splnu=0;domain=”+window.location.hostname+”;”; location.href=location.href;})(); – Sets a cookie to load pages in Classic Experience

javascript:(function(){document.cookie=”splnu=1;domain=”+window.location.hostname+”;”; location.href= location.href})();

Many of these come from our new friend Joao at his site, SharePoint.HandsOnTek.net,  here. And he’s got others.


It’s 2018

So the site got hacked…

For anyone interested in the gory details, someone figured out how to hack WordPress and, before we could work in a fix, our whole operation got taken over by a nefarious actor who loaded all our pages with links to his malware sites.

So this site is hosted at HostGator and my package includes some third party malware monitoring and they caught it and called me in the middle of the night and told me I had a problem and if I didn’t fix it, they were going to blacklist me. At first, I didn’t trust them because I had never heard of them except as a throwaway item in my Hostgator deal.

So, I called HostGator and, for a small fee, they were able to restore the site from backup. And that worked for exactly one day and, as you may have noticed, we were not generating a bunch of updates so the loss was negligible. Then apparently, something was not right in the WordPress space and the site was down until the WordPress people pushed out an update today.

So it looks like we’re back in business. A bunch of things worked but some didn’t and we were down for a month or two.

Anyway, if you’re keeping score, we’re satisfied with HostGator and we’re happy with WordPress and whoever that site monitoring company is.

I say all of that to say this: things change. And why we’re still an SPRobot, we need to move on or move out so we’re going to try to mix in some new stuff. One of our new stuffs is our new friends at the StratusFactory. They got started with MS Azure and do some cool stuff but even that might not work out for us so stay tuned.

-robot

That was nuts!

So this was me since my last post:

https://www.facebook.com/109643175745610/videos/vb.109643175745610/1019618048081447/?type=2&theater

And it’s all been MS Dynamics CRM. And now we’ve done it all and turned it over and we’re off to new things. That makes me one happy robot.

And we look at our first assignment and…

This is nuts…

My SP2010 User Provile Service Application Synch database is over 96 Gigs.

What I have is this from our new best friend, Paul.

He’s got a great description of the problem and a lot better response from MS support than this robot but he tells us what to do, both now and later.

It’s interesting that there’s a supported unsupported stored proc SQL fix he was given by the vendor to temporarily fix the probelm. And as much fun as that would be, by the end of his take, he takes us to the sequel. See what I did there?

The sequel takes us to TechNet where we get the February 2012 update for SP2010. Here, we’re informed that we must already be in SP2010 Service PAck 1 to run the CU.

The 2/12 CU dowload source is here.

Then, we learn that all the SP2010 and SP2013 updates are here.


We’ll look at this a bit more later

I wanted to be sure we remembered that this is a great InfoPath post using the lists.asmx web service inside an InfoPath form.

And Moving Forward

Step One: Getting Started (Again)

Okay, we looked at getting connected to our server via the RDP Admin client.

So, we’re presuming we have our domain and SQL Server and SharePoint farm already running. and we’ve simply added a second server so we can have a dedicated front end server to run Visual Studio 2012.

We mount the .iso using Windows now so there’s no need for a separate program for that. We right-click on the Visual Studio .exe and select Run as Administrator.

Agree to the licence terms and click Next.

Here, it gives you the opportunity to install some number of components. We check them all and click Install.

Now, there’s two progress bars and instead of a spinning pinwheel, we get little flying dots that back up and then speed off like traffic on the interstate. At least the two status bars are grammatically congruent, one being Acquiring and the other Applying.

Then you get a Setup Successful panel which is nice because it has the exclamation point and we like those a lot!

We click the Launch option and cross our fingers.

So here, the “Program Compatibility Assistant” tells us This program has compatibility issues. We click the Get Help Online option just to see what it will do.

That returns a No solutions found for  Visual Studio 2012 so we click OK, then Run the program without getting help. It doesn’t instill a lot of confidence but, hey, it says it will run.

Sure enough, we get the Choose Default Environment Settings, and we select Visual C# Development Settings, forego the local help documentation and click Start Visual Studio.

Again with the Compatibility Assistant we run the program without getting help.

More progress bars for a couple of minutes… and there’s the Start Page and a baloon suggesting we try the updates.  We click the update button for the Visual Studio 2012 Update 2. That brings up a download manager where we click Run.

The update says to close Visual Studio. We do and click Continue, Agree, and Install.

More progress bars and flying dot traffic jams. Again Setup Successful  and again, Launch this time with no Program Compatibility AssistantThat’s cool.

And we have the VS2012 Start Page.

And if we need any greater detail, our new best friend, CannonFodder, has this for us to work through the entire process.

What we don’t have is the SharePoint 2013 templates. Those are here.

As our new best friend, Tim, explains here, we can download it and run the .exe.

As it turns out, Office 2013 is a bit of a prerequisite for the SP 2013 SDK as much of it will fail without it. Now we could figure out how to get the SP templates without Office 2013 but ain’t nobody got time for that so we just install the Office bits and try again.

So then we can turn to our new best friends at SharePoint 2013 Hosting who details the web part creation process here. We follow along creating the project and defining the deployment site and the template solution gives us an error “Unable to connect to SharePoint Server.”

This turned out to be an ugly issue with the SharePoint 2013 Distributed Caching Service and the Windows Application Fabric Caching. So what we did was generate a number of links to external source that essentially led us to reinstall the AppFabricCaching service on both SP front ends this time using the latest version 1.1 bits.

Here are some helpful links:

App Fabric Intro

APP Fabric Caching – Automated

App Fabric Permissions

Lead Hosts and Cluster Management

Distributed Cache in SP2013

App Fabric Overview This one might be the best.

So after we got that sorted out, we figured out we had to start the Sandboxed Code Service on our development server. We would click the startbutton and Visual Studio would build our web part and install it in the specified site. Once there, we’d have to open a browser and navigate to the specificed site, edit the page and add the web part.

It looks like this:

HelloWorld

And there you have it, a custom SharePoint 2013 web part on a development server attached to a multi-server SharePoint farm.

hth

-robot

More Help with InfoPath 2010

First, we’ll get some help here with turning on the services so the services are all working:

sensoft2000-sharepoint.blogspot.com: Error: The form cannot be rendered…

And, this, from MSDN, shows us how to embed code in forms that can run in a server’s local sandbox: InfoPath 2010 and Visual Studio

But what we really need is to figure out how to get our form projects created in Visual Studio.

So, if we’re starting from scratch, this gem from MSDN is a prerequisite:

Building SharePoint Applications with InfoPath 2010 (Part 1 of 2)

Here we learn a thing or two. First we’re not going to get very far telling our customers to figure it out themselves using Word or Access; InfoPath is the only solution that support moderate complexity and custom, C# code.

Note also, that our options are to develop bullet-proof “administratively deployed forms in SharePoint’s InfoPath form server. This, of course requires access to Central Admin. And if your customer is a SharePoint consumer, that may involve interaction with an IT department that’s less accommodating that one might expect. Alas, InfoPath will allow us to install local forms with custom code. This video, from MSDN, explains that these local form solutions will  run in a server’s local sandbox: InfoPath 2010 and Visual Studio. We can also see that the sandbox draws the line at access to the client files and settings. So really, these “local-custom” form will probably suffice in many situations without having to poke the IT hornets’ nest.

So here’s a great “Hello World” starter from MSDN: Using the InfoPath 2010 Object Model and Visual Studio Tools for Applications

Here, we learn, if you want to embed your code in your form and install it into a site library, you’ll have to use MS Visual Studio Tools for Applications. This is an Office Setup operation. You’ll have to have your Office install bit and may need your product key. Include the .Net Programmability option and it takes the rest of the day!

When you run the install, you’ll get to a point where you get to select the components you need to install. The InfoPath component will have an expansion “+” icon and you can blow it up until you get to where you can select to have MS VS for Applications “Run from my computer.”

Also, be sure your target SharePoint site is in a site collection where the SharePoint Server Enterprise Site Collection features” have been activated. This is different from the top level site collection’s site features and you can find it at: /_layouts/ManageFeatures.aspx?Scope=Site

And here’s a great detailed listing for control that will and won’t work in browser forms: InfoPath 2010 features unavailable in Web browser forms

So we can get to VST for Application on the second part of MSDN’s Building SharePoint Applications with InfoPath 2010 (Part 2 of 2) which seems to be very well written and provides a great glimpse at the need for the SharePoint Sandboxed Solutions Service.


You Don’t Have to Do It All By Yourself!

… and the number one reason why SharePoint is fun is:<DING>

The SharePoint Community!!!

And what you find when you pull your little flower off the wall is that if you reach out, you’ll find someone that’s getting rich giving you what you need for FREE!!!

I don’t know how that works but I like FREE.

For example, like Herman Cain said here (at 3:42), Errybuddy Need Toucan Stubbs, everybody that calls themselves a SharePoint Anything knows the number one problem with SharePoint in Production is: <DING>

Unchecked Site Sprawl.

Yes, sites reproduce themselves like rabbits in March and, before you know it, you’ve got more rabbit stuff in more places than anyone can manage. The growth is EXPONENTIAL. If you need a quick lesson in exponential growth, check out this explanation from our favorite mathematician, Vi Hart.

Is that the best description of SharePoint site sprawl ever?

Now, like a robot, I prevent this with one mindless assertion:

Nobody gets permissions to edit permissions but me.

Then, like a robot, I take care of  all permissions.

Of course, no human is capable of that kind of effort. In the human world, what you need is a governance plan and that is where our new best friend, Kate, at InfoTech really steps up. She’ll GIVE us a SharePoint governance plan FOR FREE right here.

They even let you take their logo off it and put your own on it. Boom, just like that, you’re in the SharePoint Governance Business.

Then, they’ll entice you with other free stuff.

Like this vendor selection support,  this cool vendor comparison tool, and these SharePoint DEV\OPS Management resources.

So, since this robot has already covered the install, now, here you have all you need to select, assess, manage, customize and govern your SharePoint empire.

Clearly, the only reason SharePoint talent in such demand is that SharePoint skills are scarce. And the number one reason that SharePoinit skills are scarce is <DING>

People can’t read!

Lucky for me, the same does not apply to robots.

So, learn to read, put on your metal Skullcrusher (2:20) and get in the game. This robot is tired of having to deal with pushy recruiters.

hth!

-robot

ps. Special thanks to Kate at InfoTech. Keep all that great stuff coming!


PowerShell Re-Introduction Part Four: Our First Script

Part One: More PowerShell: A Re-Introduction If You’re Starting from Scratch
Part Two: PowerShell Re-Introduction: Part Two
Part Three: PowerShell Re-Introduction Part Three: Script Prerequisites

 Okay, let’s say we want a script that will open our Hosts file so we can edit it. Easy, you say. Well maybe.

The first challenge here is that in order to edit and save your Hosts file, you have to run Notepad as an administrator. So if we simply open PowerShell and run Notepad.exe, we’ll can edit the file but we can’t save it; we’ll get an access denied error.

The second challenge is that we have to set the execution policy simply to run a script and we have to run PowerShell as an administrator to even do that.

To demonstrate, right click on PowerShell and select Run As Administrator.

Run Notepad.exe. This will open Notepad.

In Notepad, enter notepad.exe c:\windows\system32\drivers\etc\hosts. CTRL-S to save. Save as Hosts.PS1 it into your PSTest folder you created last time or somewhere else that’s convenient. Note, here, that .PS1 is the recognized extension for PowerShell script files and they are that easy to build, in Notepad or other test editor much like DOS batch files.

Now, in PowerShell, navigate to your PSTest folder where the script live and enter DIR. You’ll get a directory listing of your folder. Why, Well, like we learned last time, if you run Get-Command DIR, you’ll see that it’s the same as Get-ChildItem.

In our directory listing, you’ll see your .PS1 file. We can run this from here:

Script Execution Error

Script Execution Error

 Okay, maybe not so much.

First, it’s telling us our command is not recognized, check spelling and path. That’s not our problem.

Then it tells us our file exists but was not found. If we want PowerShell to find it, we have to build some some context into our command using .\<Command> format made famous by our Linux friends. Let’s try it.

Execution Policy Error

Different Error. This is our Execution Policy stopping us.

So, lets run Set-ExecutionPolicy Unrestricted. This requires us to confirm by entering Y.

Now, when we run .\Hosts.PS1, our hosts file opens and we can edit it, save it and close it.

Now, this is good but not great. What we’d like is a file we can click on in Windows Explorer, set the execution policy and open the file. When you right click on the .PS1 file, you don’t get a Run As Administrator option.

Well, one way to do this is to create a shortcut to PowerShell.exe and pass it your script file as a test string like this:

C:\Windows\System32\WindowsPowerShell\v1.0\powershell.exe “C:\PSTest\Hosts.PS1”

 Then you can right-click on the shortcut and run it as an administrator.

There’s your first script. We’ll look at different persmission options. more sophisticated scripts, and the ISE next time.

http://www.powershellpro.com/powershell-tutorial-introduction/

-robot 

PowerShell Re-Introduction: Part Two

Last time we met our new robot friend, the PowerShell Command Line Interface. We learned some cool tricks. We tried to say “Hello” and got a response and started to learn how to talk PowerShellian. We learned that PowerShell really only listens to four things and we called the “Suitable Commands.” They are:

  • CMDLETs
  • Functions
  • Scripts
  • Operable Programs

We looked at that last item, operable programs and we saw how we can run Notepad from our command line.

Now, let’s look at the first, CMDLETs. CMDLETs are the magic of PowerShell. If we’re going to learn anything about CMDLETs we’re going to have to GET some HELP.

That, friends and co-workers, is what Deputy Chief Brenda Lee Johnson (a.k.a. The Closer on TNT) calls a “Clue.”

Get-Help, get-help, Get-Help, gEt-helP, any of those are all the same thing to PowerShell so let’s try it.
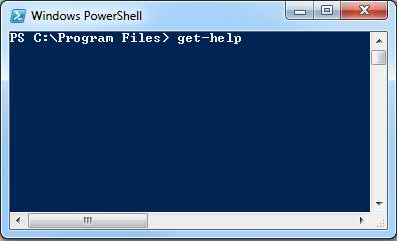
Get-Help

The Get-Help CMDLET

Remember this. This is our first cdmlet. Note again that case does not matter. Note also the Verb-Noun format. Every cmdlet employs this format. The verbs are usually something like “get” or “set” while the nouns are any, and I mean any and every, Windows object. Don’t worrry about what this means yet but just remember that when you get the object, you get all of its properties and their values. You also get all of their methods; don’t worry about this yet either.

 Here’s what we “get:”
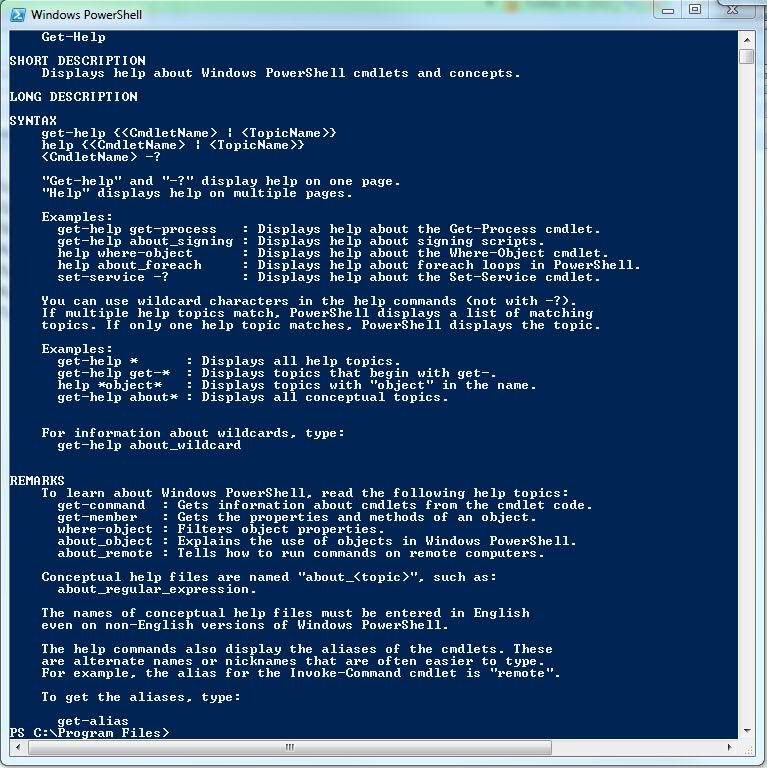
 
PowerShell Get-Help

The Get-Help CMDLET Output

I gotta tell you friends, for this robot, this really is the keys to the car; here’s where you can find all you need to know to become the greatest Windows robot ever.

Let’s look at some of these details.

First we get a short description.  Very nice.  Then a long description with syntax and remarks. Hmmm…

Let’s just look at the very first line: get-help <CmdletName>

We we know exactly one cmdlet, Get-Help. Let try it…
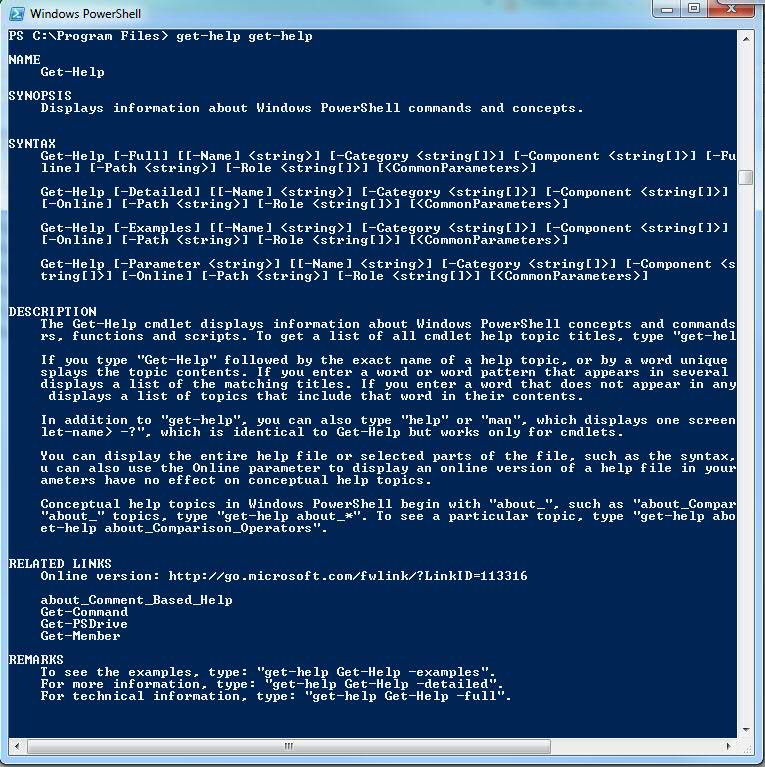
Get-Help Get-Help

Help for Get-Help CMDLET

Awesome. Get-Help blah blah blah… But, wait, that’s not all. Look at the Remarks at the bottom. Here, you can get examples, more detailed information or even more technical detailed information. For example, Get-Help Get-Help -full. Here we get a full ten pages of things we can do with Get-Help including:

  • Synopsis
  • Syntax
  • Lengthy Description
  • Parameters
  • Inputs (Not allowed on Get-Help)
  • Outputs
  • Notes
  • Examples (15 in all)
  • Related Links – including a go.microsoft.com link to online help.

At the very end here, while we’re still overwhelmed with all that PowerShell does to make Get-Help work for us, they drop a second jewel on us, Get-Command. Let’s try it.Entering the Get-Command CMDLETPress Enter… Did you see that? Below we can see the last of the output that scrolled by when we ran the Get-Command cmdlet.
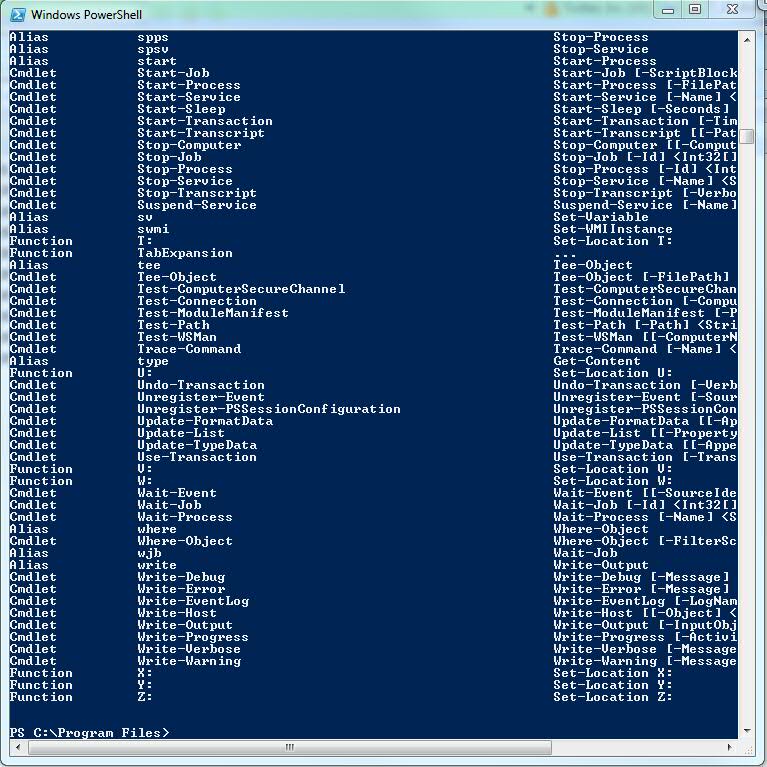
Output from Get-Command

The Last Screen of Output from Get-Command

And there you have it, every command that PowerShell can run. Along with the cmdlets, we also get functions and aliases and we’ll look at those later. For example, we can start at the top, we’ve got an Alias % and an Alias ? and a function A: and then another Alias, ac. But then we get the first cmdlet in our list Add-Computer. Let’s Get-Help it:
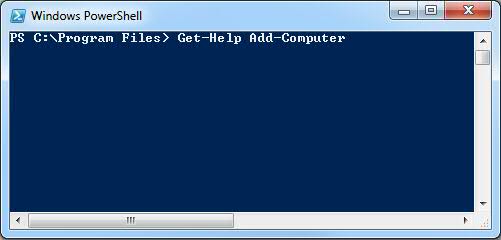
Get-Help Add-Computer

Running Get-Help Add-ComputerAnd we get: Output from Get-Help Add-Computer

That’s great. We see we can roll into PowerShell and run the Add-Computer cmdlet to add our computer to a domain. We see that we add in parameters for the domain name and the credentials and some other stuff necessary to join a domain. Great.
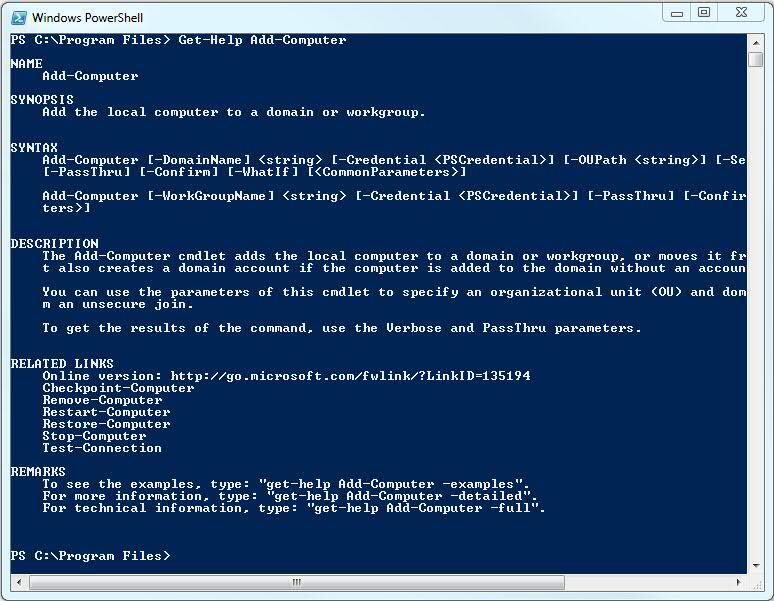
Help for Add-Computer

Output from Get-Help Add-Computer

All we have to do is learn everything about each of these cmdlets and we know all there is to know about PowerShell, right?

Well, no so fast.

First, by default, we only get the Windows library for the version of Windows we’re running, in my case Win 7. That doesn’t mean there’s not more. Microsoft pretty much publishes a library for every product it sells. And here’s the kicker, the “theory” is that ANYTHING you can do using a Microsoft product’s GUI, you can do in PowerShell; it is intended to be the command line interface for all things Microsoft. We just need to learn how to load those libraries.

Second, we’ve got those other “Suitable Commands” such as functions and scripts. We covered operable programs and we started on cmdlets so, sure, functions and scripts will be coming up next.

Finally, and this is were we might leave you. We’ve mentioned this before and we’re almost done for the day so you’ll have some time to think about what this means. PowerShell is object oriented. What this means is that when you run Get-Something, you actually have an instance of that something in memory with all of it’s properties and methods. Unlike DOS, when you run a command, you got a text string that you had to work with to figure out what it was telling you, in PowerShell, you get the real object. Set a variable to a Get-Something and that variable has all the properties and can run all the methods of every other Something ever created. When we do this, we will chain cmdlets together, called “piping” because you use the pipe character, “|,” to create, read, update and delete any artifact you’ve ever seen in any Microsoft product.

Let’s review.

Get-Help – Why would you start anywhere else?

Get-Command – Displays all the suitable commands you’re currently able to use.

Cmdlets, Functions, Scripts, Operable Programs – All suitable commands.

Libraries – Bundles of cmdlets that support various Microsoft technologies.

Object Oriented – Uses real objects in memory.

Piping – Chain one command to another to build extremely sophisticated solutions.

We’ll be getting more done soon enough.

-robot

Debugging the MVC Application

So your MVC apps do really start the same way and our new best friend, Stephen, describes how to set the startup page here.

And then there’s the tutorial from Microsoft’s ASP.NET site here.