Archive for May 2012


PowerShell Re-Introduction Part Five: PowerShell Rookie Review

Part One: More PowerShell: A Re-Introduction If You’re Starting from Scratch
Part Two: PowerShell Re-Introduction: Part Two
Part Three: PowerShell Re-Introduction Part Three: Script Prerequisites
Part Four: PowerShell Re-Introduction Part Four: Our First Script

So we’ve got cmdlets and script basics nailed down. We still have to look at a couple of things to shake off the “rookie” label.

For example, we might think we need a cheat sheet like this. And, of course, PowerShell.Com is the Bomb. They got this wicked cool example of adding a clock to your PowerShell console here.

So while we need to review all the details we’ve covered, let’s take a minute to look at what our friends have done that might help us extend our knowledge into more valuable spaces.

First, here’s a great video looking at PowerShell Maturity from Idera.Com and Tobias Weltner:

http://www.idera.com/Events/RegisterWC.aspx?DoThis=TY&EventID=289

And here’s some more help with filters and pipes:

http://www.computerperformance.co.uk/powershell/powershell_wmi_filter.htm

For example try this one:

Help Get-EventLog

What we see here is that we can go to a remote computer and get the system log and check the errors.

Finally, in a domain it’s less complicated because console and remote computer can share user credentials, but for non-domain computers or computers in different domains, we need to learn how to log in remotely. To help with that, we have this from TechNet:

http://technet.microsoft.com/en-us/magazine/ff700227.aspx

What we see here is that running PowerShell commands that target remote computers requires two things:

  1. The remote target must be running the WinRM service.
  2. You have to run PowerShell as an administrator.

Most of this is taken care of using Enable-PSRemoting on the target. Of course, you get a lot smarter if you run:

Help Enable-PSRemoting

 Then, we get the money pitch from the Scripting Guy: Here‘s the fastball that explains how to log into a remote machine using a specific user ID and password.

-robot

PowerShell Re-Introduction Part Four: Our First Script

Part One: More PowerShell: A Re-Introduction If You’re Starting from Scratch
Part Two: PowerShell Re-Introduction: Part Two
Part Three: PowerShell Re-Introduction Part Three: Script Prerequisites

 Okay, let’s say we want a script that will open our Hosts file so we can edit it. Easy, you say. Well maybe.

The first challenge here is that in order to edit and save your Hosts file, you have to run Notepad as an administrator. So if we simply open PowerShell and run Notepad.exe, we’ll can edit the file but we can’t save it; we’ll get an access denied error.

The second challenge is that we have to set the execution policy simply to run a script and we have to run PowerShell as an administrator to even do that.

To demonstrate, right click on PowerShell and select Run As Administrator.

Run Notepad.exe. This will open Notepad.

In Notepad, enter notepad.exe c:\windows\system32\drivers\etc\hosts. CTRL-S to save. Save as Hosts.PS1 it into your PSTest folder you created last time or somewhere else that’s convenient. Note, here, that .PS1 is the recognized extension for PowerShell script files and they are that easy to build, in Notepad or other test editor much like DOS batch files.

Now, in PowerShell, navigate to your PSTest folder where the script live and enter DIR. You’ll get a directory listing of your folder. Why, Well, like we learned last time, if you run Get-Command DIR, you’ll see that it’s the same as Get-ChildItem.

In our directory listing, you’ll see your .PS1 file. We can run this from here:

Script Execution Error

Script Execution Error

 Okay, maybe not so much.

First, it’s telling us our command is not recognized, check spelling and path. That’s not our problem.

Then it tells us our file exists but was not found. If we want PowerShell to find it, we have to build some some context into our command using .\<Command> format made famous by our Linux friends. Let’s try it.

Execution Policy Error

Different Error. This is our Execution Policy stopping us.

So, lets run Set-ExecutionPolicy Unrestricted. This requires us to confirm by entering Y.

Now, when we run .\Hosts.PS1, our hosts file opens and we can edit it, save it and close it.

Now, this is good but not great. What we’d like is a file we can click on in Windows Explorer, set the execution policy and open the file. When you right click on the .PS1 file, you don’t get a Run As Administrator option.

Well, one way to do this is to create a shortcut to PowerShell.exe and pass it your script file as a test string like this:

C:\Windows\System32\WindowsPowerShell\v1.0\powershell.exe “C:\PSTest\Hosts.PS1”

 Then you can right-click on the shortcut and run it as an administrator.

There’s your first script. We’ll look at different persmission options. more sophisticated scripts, and the ISE next time.

http://www.powershellpro.com/powershell-tutorial-introduction/

-robot 

PowerShell Re-Introduction Part Three: Spript Prerequisites

Part One: More PowerShell: A Re-Introduction If You’re Starting from Scratch
Part Two: PowerShell Re-Introduction: Part Two

So in our last two efforts, we tried to cover the PowerShell Command Line Interface (CLI) and the way it runs programs and cmdlets. Remember, we covered the way to get help regarding a cmdlet and the way to list all the available cmdlets.

This time, let’s explore that a little more and then see if we can begin to chain cmdlets together to form PowerShell scripts and manage those scripts in PowerShell’s native Integrated Script Editor (ISE.)

First, let’s look at what we already know and what the robot inside PowerShell might be trying to tell us.

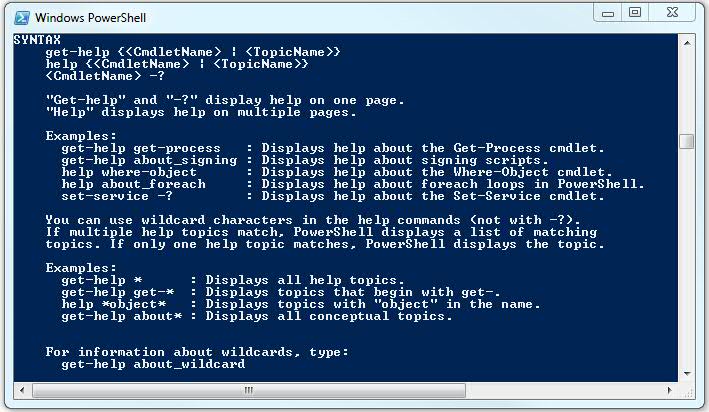
We can run Get-Help. Part of what we get back is the Get-Help cmdlet’s syntax, including some examples:

Gety-Help Syntax

Get-Help Syntax

So as we see, we can run Get-Help for any of our cmdlets. But we can also just run plain old Help.

We can also just drop a -? after a cmdlet and get it’s help file. Let’s try the first example:

 Get-Help Get-Process and Get-Process -? return the same page:

Get-Process -?

Get-Process -?

If you read the synopsis, you get an idea of where we’re headed; with get-process, you can actually get a running process in Windows and make it do stuff, even from a remote computer.

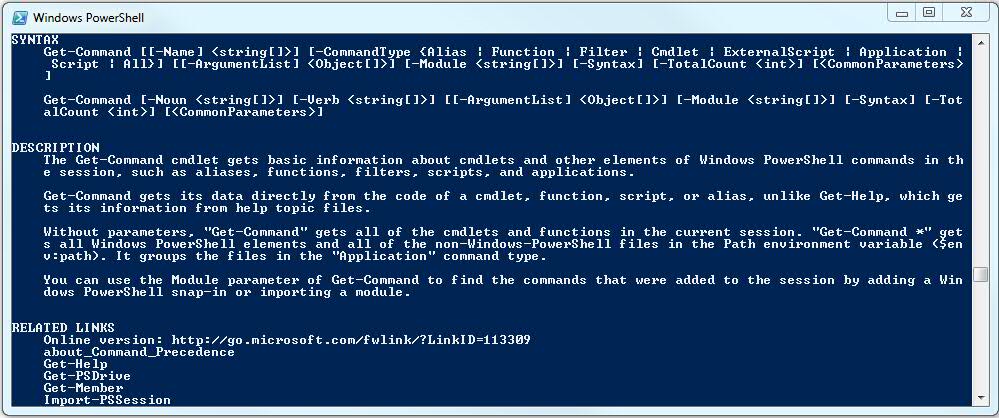
But first things first. Let’s look at one we already know, get-command and see what we get with Get-Help Get-Command -full and look at the syntax and description:

Syntax and Desription for Get-Command

Syntax and Desription for Get-Command

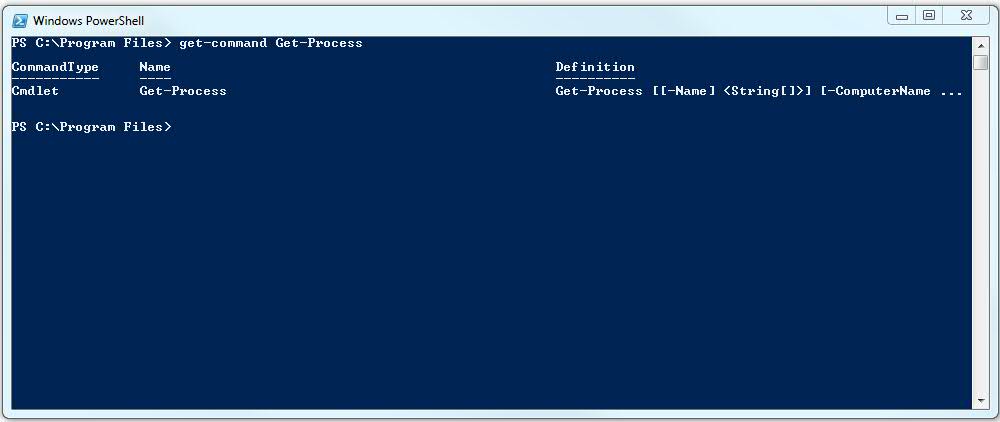
 First, the syntax tells us we can select a single command, like get-process:

Get-Command Get-Process

Get-Command Get-Process

 But we can also filter for cmdlets or functions, etc. Try these:

  • Get-Command -CommantType cmdlet
  • Get-Command -CommantType Function
  • Get-Command -CommantType Alias

 The first just lists all our cmdlets.

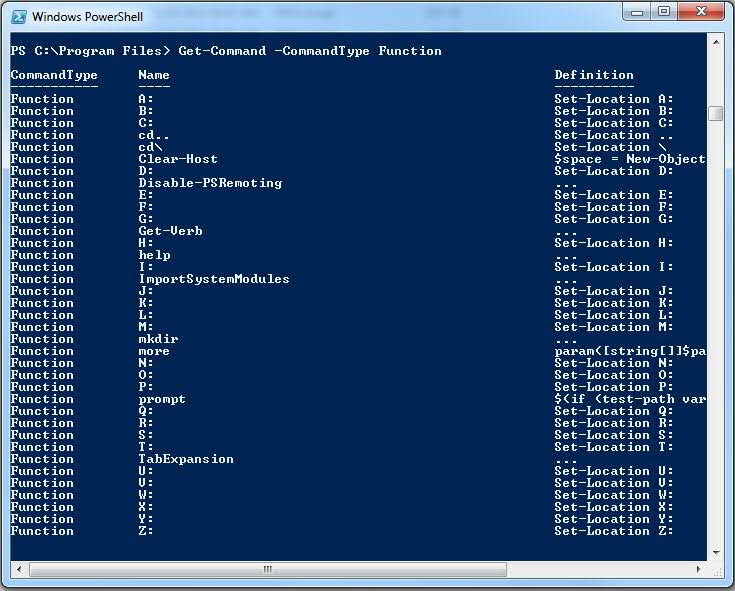
The second lists all our functions. If you look at these:

Get-Command -CommandType Function

Get-Command -CommandType Function

You’ll see some functions that are intended to make PowerShell act like DOS. For example, you can log on to your D drive simply by typing D: and you can create a new directory using the mkdir function. But look at the far right column, Definition. Here we see some of how PowerShell works. Those functions are just a cmdlet with some added text. For example, D: is defined as Set-Location D: and mkdir is defined as … 

Okay, we get it. We’re not really sure what means but we understand that we can run functions that act like cmdlets.

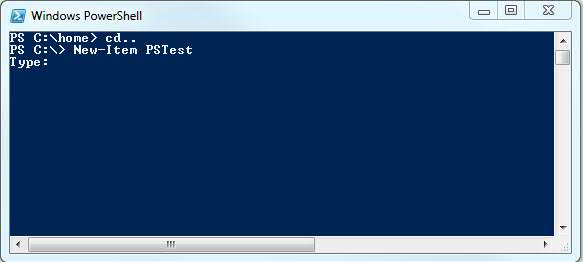
But we can run a Help mkdir and we see we get the help for New-Item and mkdir is just a method of invoking New-Item to create a new folder. So let’s navigate down our root folder on C: using CDs.. and then create a PSTest folder using this New-Item cmdlet.

New-Item

Here, we’ve lapsed into some kind of immeidate response mode and PowerShell is asking us for an item type. If we type Foo here, we’re going to get an error that says only “Directory” or “File” are acceptable values. So you can try that or just enter Directory.

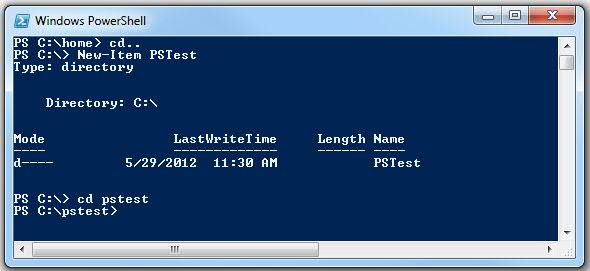
And success; we can see and then log into our new folder:

Creating and Logging into a New Folder

Creating and Logging into a New Folder

Okay, you say, enough with this trivial mechanics, let’s build something.

Sure, when but the something we’re going to build is a script or function (we’ll start with a script) and in order to do that, you have to work your away around a PowerShell’s built in security called its ExecutionPolicy. Its Execution Policy is PowerShell’s way of determining if it can trust a script. Remember that, in PowerShell, you can do anything a user can do at the Windows GUI so running a script is like letting someone else sit down at your desktop, even if that someone is a monkey, or worse, a sick, evil mastermind monkey like GoGo JoJo from the PowerPuff Girls.

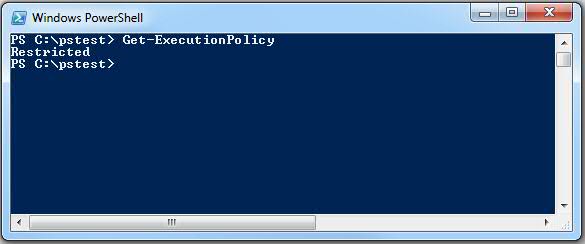
So let’s do this. Let’s run Get-ExecutionPolicy:

Get-ExecutionPolicy

Get-ExecutionPolicy

Ah, so, we’re Restricted, whatever that means. Well, to figure this our, let do this: Remember when we ran Get-Command?

One of the syntax options was -Noun. This means that we can get all our commands the involve our ExecutionPolicy with a Get-Command -Noun ExecutionPolicy:

Get-Command -Noun ExecutionPolicy

Get-Command -Noun ExecutionPolicy

So we see we can Get or Set our ExecutionPolicy. Well, yes, we run Get-Help Set-ExecutionPolicy -full.

Now there’s lots of gems here and some are more valuable than others:

  • We see that to set the exection policy, we actually have to start PowerShell by right clicking and selecting Run As Adminstrator.
  • We see that the execution policy can be assigned to the user, the machine or a process; the default is LocalMachine.
  • We see it protects configuration files including your PowerShell profile. We’ll need to know more about this, huh?
  • Our default policy is Restricted which means we can’t run scripts or configuration files.
  • We can require scripts to be “Signed” but that sounds like a technical challenge.
  • There’s stuff about Common Parameters we’ll have to cover.
  • There’s group policy restrictions that are override an ExecutionPolicy set in PowerShell.

That’s a lot of stuff. Let’s just restart PowerShell as an administrator and set our execution policy to Unrestricted and see what we can do realizing full well that if GoGo JoJo barges in, we are so screwed.

Let’s review:

  • Get-Help.
  • Get-Command with filters.
  • Native Functions.
  • Mimicing DOS commands.
  • Run As Administrator.
  • Execution Policy.

-robot

PowerShell Re-Introduction: Part Two

Last time we met our new robot friend, the PowerShell Command Line Interface. We learned some cool tricks. We tried to say “Hello” and got a response and started to learn how to talk PowerShellian. We learned that PowerShell really only listens to four things and we called the “Suitable Commands.” They are:

  • CMDLETs
  • Functions
  • Scripts
  • Operable Programs

We looked at that last item, operable programs and we saw how we can run Notepad from our command line.

Now, let’s look at the first, CMDLETs. CMDLETs are the magic of PowerShell. If we’re going to learn anything about CMDLETs we’re going to have to GET some HELP.

That, friends and co-workers, is what Deputy Chief Brenda Lee Johnson (a.k.a. The Closer on TNT) calls a “Clue.”

Get-Help, get-help, Get-Help, gEt-helP, any of those are all the same thing to PowerShell so let’s try it.

Get-Help

The Get-Help CMDLET

Remember this. This is our first cdmlet. Note again that case does not matter. Note also the Verb-Noun format. Every cmdlet employs this format. The verbs are usually something like “get” or “set” while the nouns are any, and I mean any and every, Windows object. Don’t worrry about what this means yet but just remember that when you get the object, you get all of its properties and their values. You also get all of their methods; don’t worry about this yet either.

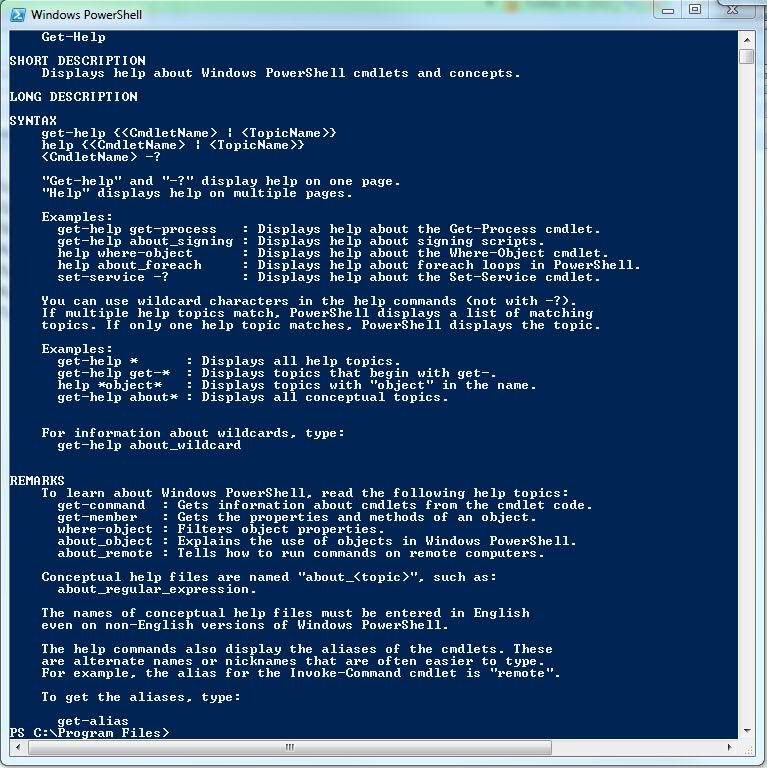
 Here’s what we “get:”

 
PowerShell Get-Help

The Get-Help CMDLET Output

I gotta tell you friends, for this robot, this really is the keys to the car; here’s where you can find all you need to know to become the greatest Windows robot ever.

Let’s look at some of these details.

First we get a short description.  Very nice.  Then a long description with syntax and remarks. Hmmm…

Let’s just look at the very first line: get-help <CmdletName>

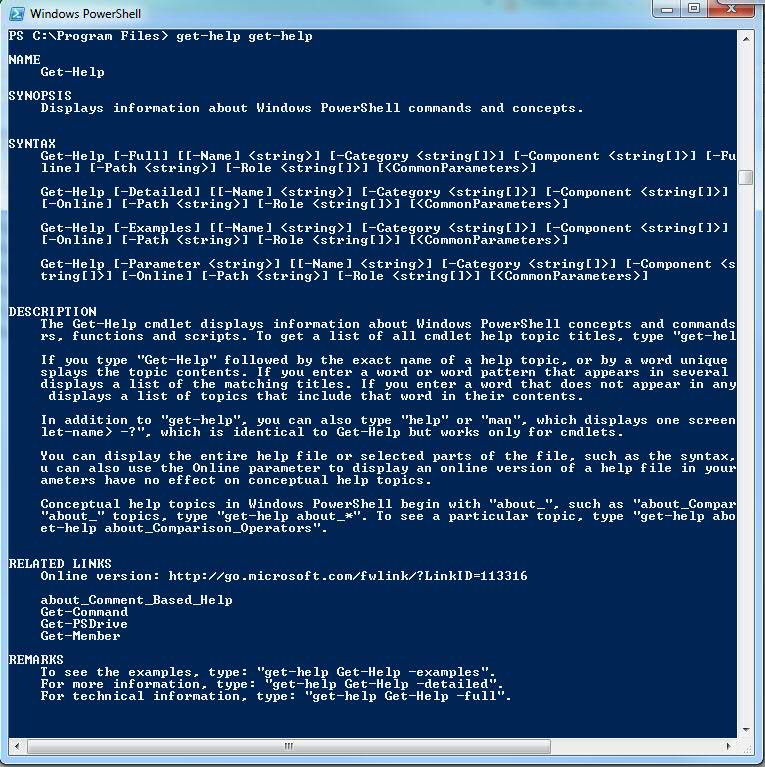
We we know exactly one cmdlet, Get-Help. Let try it…

Get-Help Get-Help

Help for Get-Help CMDLET

Awesome. Get-Help blah blah blah… But, wait, that’s not all. Look at the Remarks at the bottom. Here, you can get examples, more detailed information or even more technical detailed information. For example, Get-Help Get-Help -full. Here we get a full ten pages of things we can do with Get-Help including:

  • Synopsis
  • Syntax
  • Lengthy Description
  • Parameters
  • Inputs (Not allowed on Get-Help)
  • Outputs
  • Notes
  • Examples (15 in all)
  • Related Links – including a go.microsoft.com link to online help.

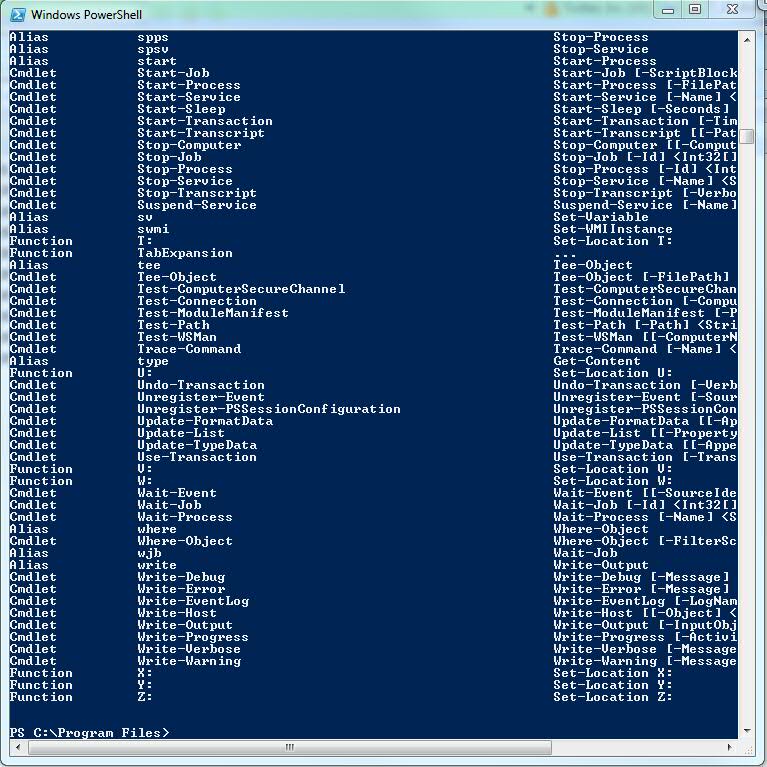
At the very end here, while we’re still overwhelmed with all that PowerShell does to make Get-Help work for us, they drop a second jewel on us, Get-Command. Let’s try it.Entering the Get-Command CMDLETPress Enter… Did you see that? Below we can see the last of the output that scrolled by when we ran the Get-Command cmdlet.

Output from Get-Command

The Last Screen of Output from Get-Command

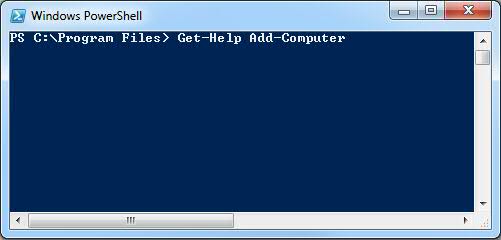
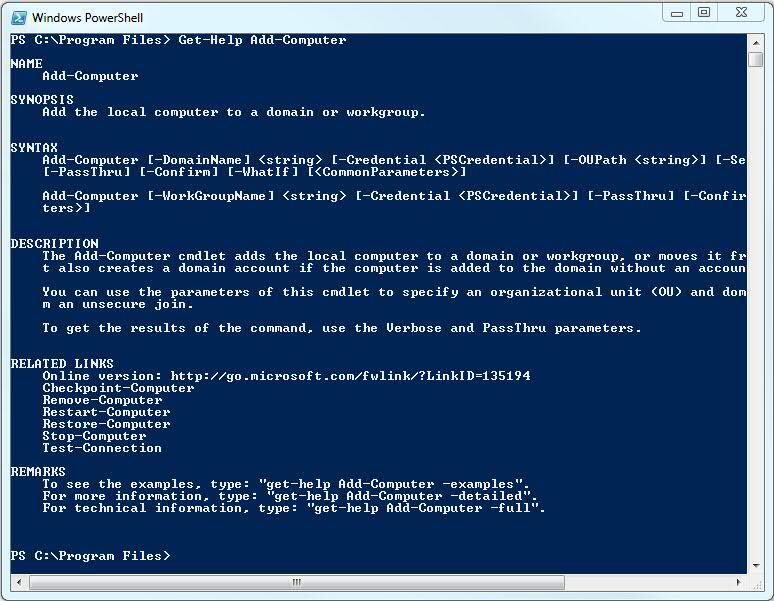
And there you have it, every command that PowerShell can run. Along with the cmdlets, we also get functions and aliases and we’ll look at those later. For example, we can start at the top, we’ve got an Alias % and an Alias ? and a function A: and then another Alias, ac. But then we get the first cmdlet in our list Add-Computer. Let’s Get-Help it:

Get-Help Add-Computer

Running Get-Help Add-ComputerAnd we get: Output from Get-Help Add-Computer

That’s great. We see we can roll into PowerShell and run the Add-Computer cmdlet to add our computer to a domain. We see that we add in parameters for the domain name and the credentials and some other stuff necessary to join a domain. Great.

Help for Add-Computer

Output from Get-Help Add-Computer

All we have to do is learn everything about each of these cmdlets and we know all there is to know about PowerShell, right?

Well, no so fast.

First, by default, we only get the Windows library for the version of Windows we’re running, in my case Win 7. That doesn’t mean there’s not more. Microsoft pretty much publishes a library for every product it sells. And here’s the kicker, the “theory” is that ANYTHING you can do using a Microsoft product’s GUI, you can do in PowerShell; it is intended to be the command line interface for all things Microsoft. We just need to learn how to load those libraries.

Second, we’ve got those other “Suitable Commands” such as functions and scripts. We covered operable programs and we started on cmdlets so, sure, functions and scripts will be coming up next.

Finally, and this is were we might leave you. We’ve mentioned this before and we’re almost done for the day so you’ll have some time to think about what this means. PowerShell is object oriented. What this means is that when you run Get-Something, you actually have an instance of that something in memory with all of it’s properties and methods. Unlike DOS, when you run a command, you got a text string that you had to work with to figure out what it was telling you, in PowerShell, you get the real object. Set a variable to a Get-Something and that variable has all the properties and can run all the methods of every other Something ever created. When we do this, we will chain cmdlets together, called “piping” because you use the pipe character, “|,” to create, read, update and delete any artifact you’ve ever seen in any Microsoft product.

Let’s review.

Get-Help – Why would you start anywhere else?

Get-Command – Displays all the suitable commands you’re currently able to use.

Cmdlets, Functions, Scripts, Operable Programs – All suitable commands.

Libraries – Bundles of cmdlets that support various Microsoft technologies.

Object Oriented – Uses real objects in memory.

Piping – Chain one command to another to build extremely sophisticated solutions.

We’ll be getting more done soon enough.

-robot

More PowerShell: A Re-Introduction If You’re Starting from Scratch

Any robot knows that robots are for doing things that people don’t want to do. For example, you would never want a robot to go to the rock show for you because you’d want to go yourself. On the otherhand, all this stuff you do everyday that drives you nuts are perfect for a robot and your robot’s favorite tool is probably PowerShell.

The latest versions of Windows gives you PowerShell by default. There’s some goofieness involved if you’re struggling to find it. Our new best friend, Liam, covers that in part here. But let’s just say you can go Start | Programs | Accessories | Windows PowerShell.

Here’s you should find two options: Windows PowerShell and Windows PowerShell ISE.

The latter option here is an integrated script editor. That will become a favorite but first, we need to understand the former option.

Click on Windows PowerShell and you’ll get a blue box.
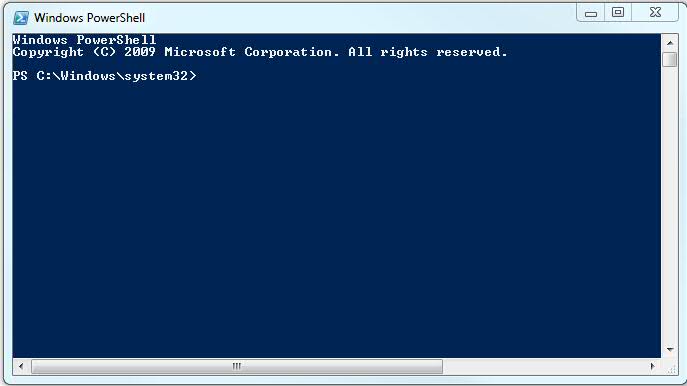
PowerShell CLI

The Initial PowerShell Command Line Interface

 You can do some pretty cool things here including access the entirety of the PowerShell libraries that are installed. So, you may ask, what is a PowerShell library? Where did I get one or more of those? Am I missing any? I’m so confused.

Well, remember, robot are just like people and the first thing they want to do when they meet an attractive stranger is say “Hello.” If that breaks something, then our relationship was just not to be. We type Hello and hit enter.
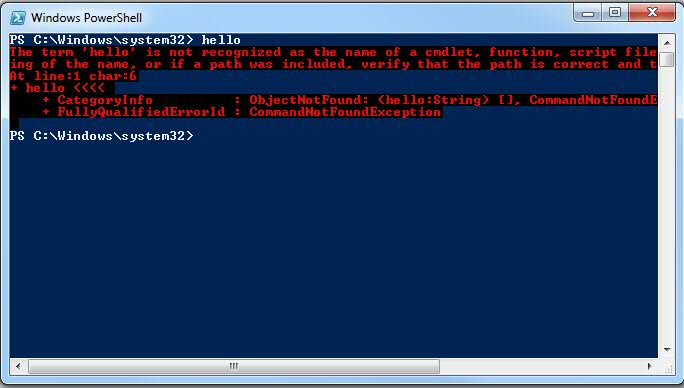
Typical Error Message

The Error Message Returned by Unsuitable Command

Well, we are talking to a stranger and seems like he could be a little nicer but at least he is verbose and all in red, presumably to get our attention. Maybe he just didn’t understand. but, instead of going to all the trouble to type “Hello” again, we can just push our up arrow. That will reload our previous command. we hit enter and, no surprise, we get the same  response. And when we do that ten or twelve times, we get get a screen full of repetitive garbage and see our scroll bar moving down the right side of our window.

Here, I’ll give you one for free. Try cls and hit Enter.

Cleared Screen

The Cleared Screen After Running CLS

Ahhh. Sweet clarity.

Note here, now if you tap your up arrow, you get cls again and if you tap it again, you get Hello. This is very clever. In fact, no matter how many commands you’ve entered, tapping up will always give you the previous command. And, as you move back into your command history, you can tap the down arrow of back out of your history.

And just to set your mind at ease here and now and for all time, your commands are NOT case sensitive. Sure HELLO and Hello and hello all generate the same response but you’ll also see that CLS and cls and cLs all clear your screen.

So, let’s tap around until we can run that Hello command one more time and take a closer look. First, it says:

The term ‘hello’ is not recognized as the name of a cmdlet, function, script file, or operable program.

 Okay…

We need to get smarter about what these things are. I’m going to call them “suitable commands.” Obviously, a suitable command is a cmdlet, function, script file or operable program. Let’s start with the last item, an operable program. We know what these are and we have some. For example, we have a program called notepad.exe that lives in c:\windows\system32. So let’s type notepad.exe and hit enter.

Sure enough, Notepad opens.

Also note that while PowerShell opens in c:\windows\system32 and notepad.exe lives in the same folder, you can run a cd.. command twice and your PowerShell will be reading the c:\ root folder. You can run Notepad.exe here and still, Notepad will open. This implies that your PowerShell prompt is able to find the program in this different, remote folder, even if that folder lives on a different path.

Okay, one more robot trick. After you’ve cd.. twice, you can see that you’re in the root C:\ folder. Here, you can type cd pro

A Partially Entered Command

A Partially Entered Command

… and tap your Tab key and our new robot friend will fill in the friggin’ blanks suggesting we’re really trying to type cd program files but just got all lazy human-like.

Type Ahead Code Completion

Type Ahead Code Completion

And it gets even better. Say you’re crazy lazy, here you can just type, n and tap you tab key and our robot friend will give you the first suitable command that starts with the letter “n” …
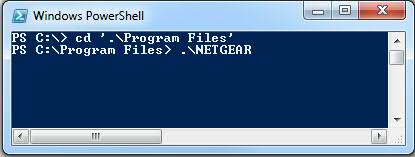
Type Ahead Code Completion

The First Suitable Command Consistant with Partially Entered Command

In this case, we see, that’s a folder called .\NETGEAR. But we can can cotinue to tap the Tab key and our robot friend will cycle through all the suitable commands in the current folder and all the known paths and offer each of the suitable commands that begin with the letter “n” alphabetically. We can Tab  and Tab until we get to notepad.exe and hit enter and run Notepad.

So lets review:

Up Arrow – Loads previous command consecutively.

CLS – Clears the screen.

CMDLETs are NOT case sensitive.

Command line can open executables.

Command line can read from remote paths and folders.

Tab will try to complete any partially entered command.

That’s a lot for one robot in one day so let’s just plan on looking at those other suitable commands,  next time.

-robot